CI/CD
can be a mess at times, especially for newbies. The stress of having to
use products you aren’t familiar with. But with GitLab’s integrated
CI/CD feature it takes most of the hassle away.
So our app would just take in two inputs, adds them together and returns the answer. Not so much you might say.
Dependencies:
express: — for handling our web server
body-parser: — Node.js body parsing middleware.
mocha: — test framework to run our unit test
chai: — javascript assertion library
supertest: — help us test our API endpoints
Create our project on GitLab:
If you haven’t already, navigate to https://gitlab.com/ to create a GitLab account, or sign in into your account to create a new project.
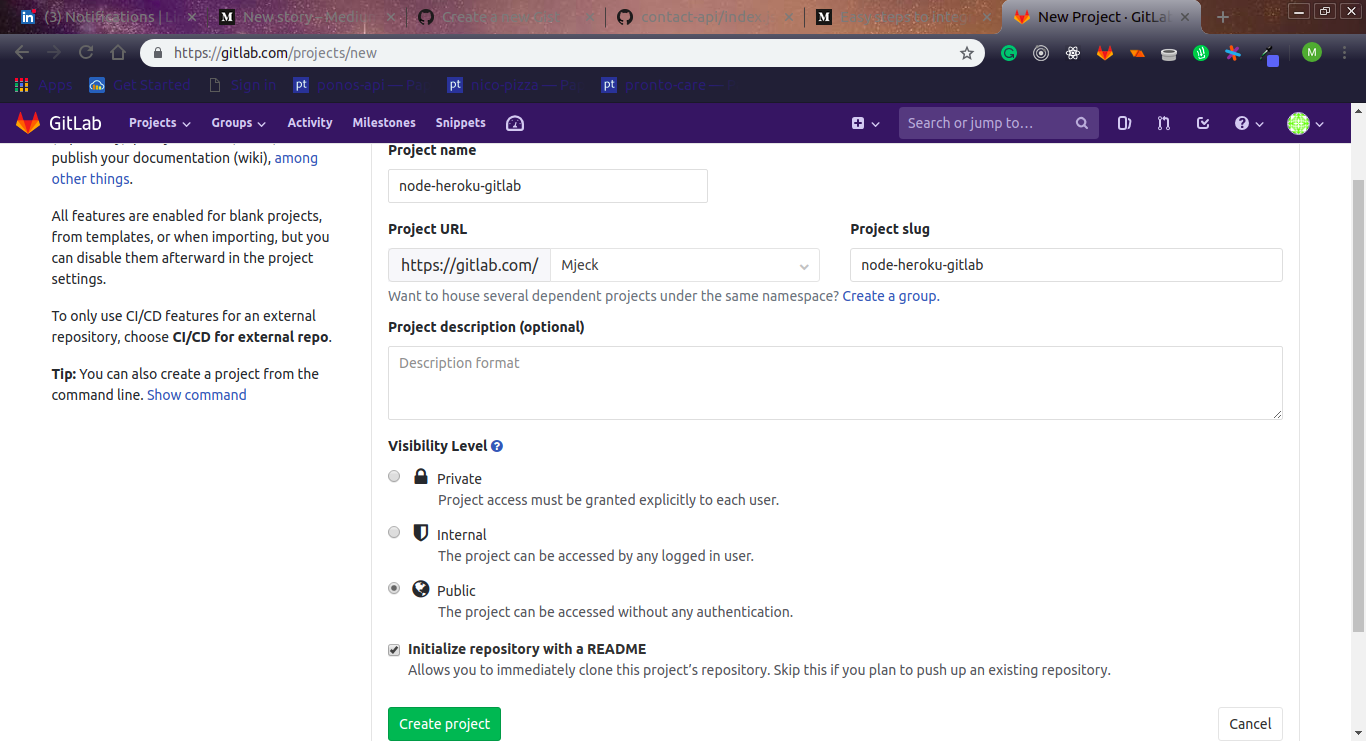
Create a new project on GitLab
From the above image, we made the project public and checked the initialize Readme box, click theCreate project button to create our new project on GitLab.
Clone Project:
Clone Project with HTTPS
After our project has been created, click on the blue dropdown on the top right corner with the text Clone and select Clone with HTTPS or Clone with SSHclick on the copy icon and paste in your terminal of choice as such
The
above snippet helps us prevent most autogenerated files and folders
from been pushed to our remote git repositories. One such folder is the node_modules folder.
Install our dependencies:
Next, we install the necessary dependencies. Type in the following into your terminal
npm i -S express body-parser mocha chai supertest
Setup our server:
Next, we create a new index.js file to house our server code and addition function. Copy the following into the file.
const express =  require('express');
const bodyParser = require('body-parser');

// Our function which adds two numbers and returns the result
const addNumbers = (firstNumber, secondNumber) => {
//   check that input is a number
  if (typeof(Number(firstNumber)) !== 'number' || typeof(Number(secondNumber)) !== 'number') {
    return 'Values should be integer or numbers'
  }
  return Number(firstNumber) + Number(secondNumber);
}

// Destructure our bodyParser methods
const { urlencoded, json } = bodyParser;
const port = process.env.PORT || 8080;
// intialize our express app
const app = express();

// Parse incoming requests data (https://github.com/expressjs/body-parser)
app.use(json());
app.use(urlencoded({ extended: false }));

// end point to add numbers
app.post('/api/add', (req, res) => {
  const { firstNumber, secondNumber } = req.body;
  const result =  addNumbers(firstNumber, secondNumber);
  return res.status(200).send({
    result
  });
});
// app entry point
app.get('/', (req, res) => res.status(200).send({
  message: 'Welcome to our glorious app',
}));
// Setup a default catch-all route that sends back a welcome message in JSON format.
app.get('*', (req, res) => res.status(200).send({
  message: 'Welcome to the beginning of nothingness.',
}));

app.listen(port, (err) => {
  if (!err) {
     console.log(`App started on port ${port}`);
  } else {
    console.log(err);
  }
});

module.exports = app;
Next, we edit our package.json file by adding a start script in our scripts object.
{
  "scripts": {
    "start": "node index.js"
  }
}
Let run app. Type the following in your terminal
npm start
You should get App started on port 8080 printed on your console.
Write Unit TestCreate a tests.js file in your current directory and paste the following code
In the last part , we able to set up our git repository on GitLab set up our Node app with Express and write one unit test. In this part, we’ll cover the following: Setup of the app on Heroku GitLab CI/CD configuration using the .gitlab-ci.yml file GitLab repository:- https://gitlab.com/Mjeck/node-heroku-gitlab That done next is to create our app on Heroku. If you don’t have an account yet navigate to https://heroku.com and create a free account. With that done log on to your Heroku dashboard and create a new app. Create a new app on Heroku. Next, we go to our project directory in our code editor and create a new file and .gitlab-ci.yml paste the following code. # Node docker image on which this would be run image: node:8.10.0 cache: paths: - node_modules/ stages: - test - deploy_production # Job 1: Test: stage: test script: - npm install - npm run test # Job 2: # Deploy to staging Production: image: ruby:latest only: - ma...


Comments
Post a Comment